1、CentOS7下配置snmpd服务
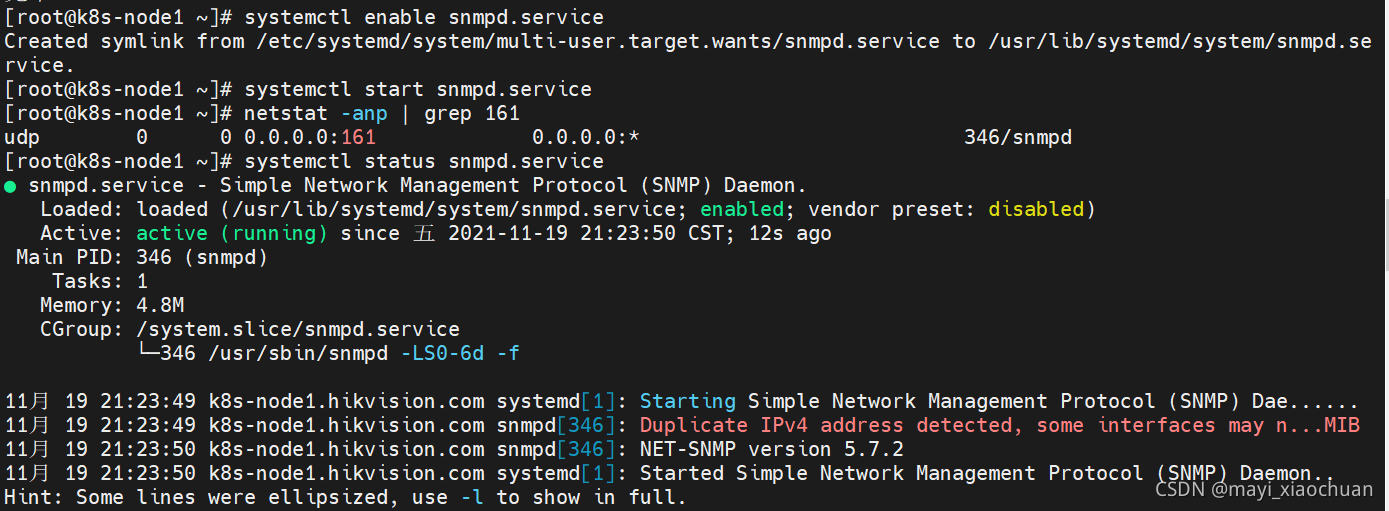
#安装snmp服务
yum install net-snmp net-snmp-utils
#设置开机自启动
systemctl enable snmpd.service
#启动snmp服务
systemctl start snmpd.service
#查看snmp端口161是否存在
netstat -anp | grep 161
#查看snmp状态
systemctl status snmpd.service
#snmp v2版本信息获取查看
snmpwalk -v 2c -c public 192.168.1.171
操作过程:


2、使用net-snmp-create-v3-user进行snmp v3配置
1)先停止snmpd服务
systemctl stop snmpd.service
2)使用net-snmp-create-v3-user命令进行snmp v3配置用户名和密码:
[root@k8s-node1 ~]# net-snmp-create-v3-user
Enter a SNMPv3 user name to create:
snmpuser
Enter authentication pass-phrase:
1111qqqq
Enter encryption pass-phrase:
  [press return to reuse the authentication pass-phrase]
1111qqqq
adding the following line to /var/lib/net-snmp/snmpd.conf:
   createUser snmpuser MD5 "1111qqqq" DES 1111qqqq
adding the following line to /etc/snmp/snmpd.conf:
   rwuser snmpuser
[root@k8s-node1 ~]#
按上面的输出提示可以查看如下两个配置中新增行:
tail -n 5 /var/lib/net-snmp/snmpd.conf
tail -n 5 /etc/snmp/snmpd.conf


3)启动snmpd服务
systemctl restart snmpd.service
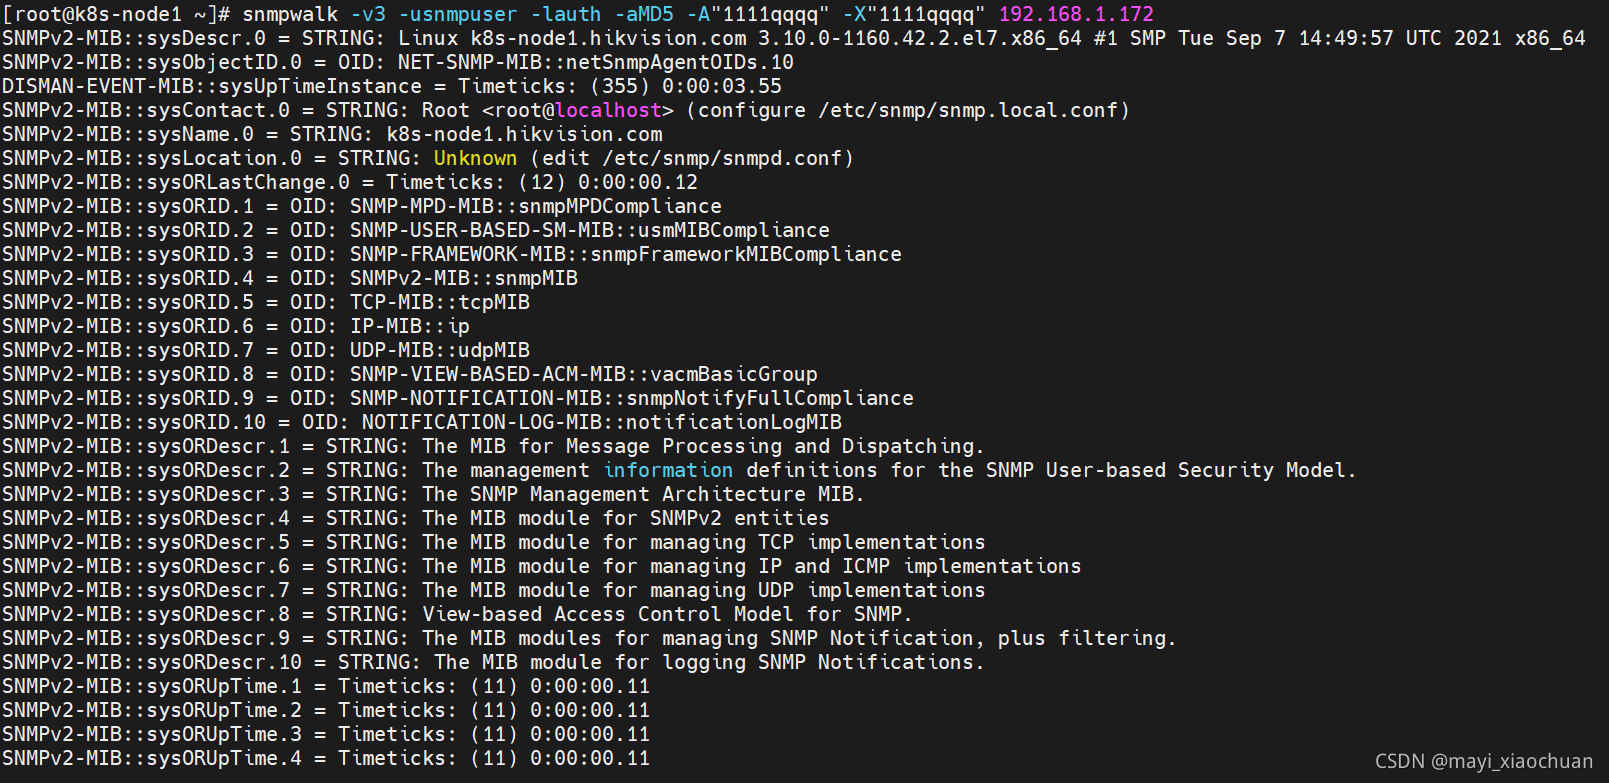
4)snmpwalk命令验证

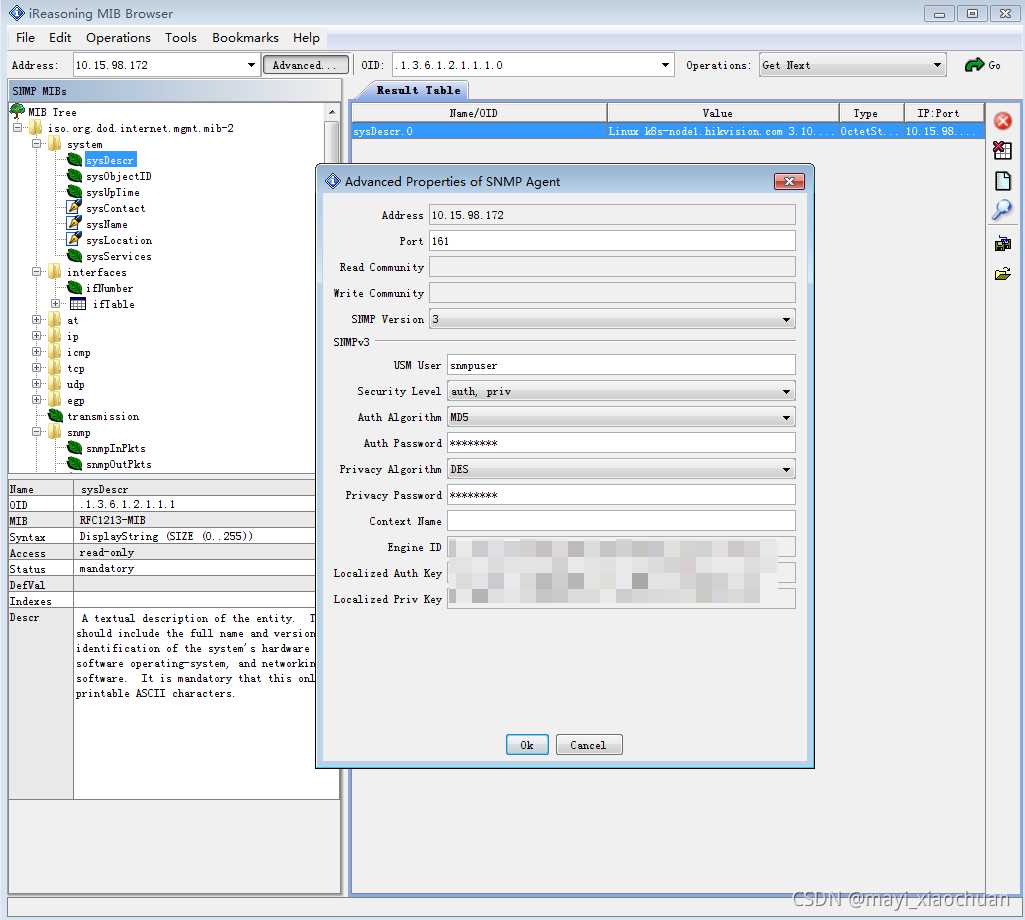
或者用其它snmp客户端工具测试

https://blog.csdn.net/mayi_xiaochaun/article/details/121431244
最新评论: